As website designers and developers we’re constantly concerned about both the form and the function of the websites we create. From a practical standpoint this means making sure the pages that we develop look aesthetically pleasing while serving the visitors functional needs. In this post we’ll look at a way to showcase a form only when visitors take a proactive action, like clicking a button or link. So let’s get started!
Customer Use Case:
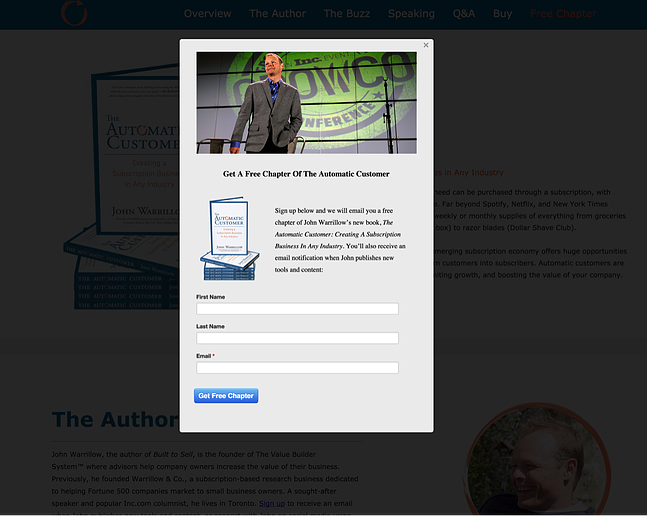
In this particular scenario the customer is a best selling author who wanted to give visitors an easy way to submit their information in exchange for a chapter of his new book. The form needed to be accessible from multiple areas on the page; however the customer didn’t want to use unnecessary screen real estate for the form if he didn’t have to. This resulted in the decision to use a javascript modal. See the screenshot below to see how the form displays on the page.
How To Implement The Modal in Your CMS Designs
Javascript File
The first thing that you will need to do is attach the javascript file in the HubSpot content setting under “Site Header HTML”. You can find the Javascript file here on Github. Once you have attached the javascript file in content settings, you are ready to start constructing your template in design manager.
The Modules You’ll Need
To implement the modal, you will need to put in a custom HTML module in your HubSpot template. It’s not really important where you have the module placed in your template because ultimately, it will not display in your layout. (Below is a screenshot of the module layout in design manager.)
The HTML
Once you have the custom HTML module in your template you're ready to put in the code. Place in the snippet below when you are editing your page:
<div id="myModal" class="reveal-modal">
<h1>Modal Title</h1>
<p>Any content could go in here.</p>
<a class="close-reveal-modal">×</a>
</div>As you can see from the code above, you are given a basic div, header, and paragraph. You can put in whatever content that you would like into these sections. In my example I embedded some images, a header, some text and a Hubspot form, although you can tailor your modal to your specific website needs.
The CSS
Once you have the module setup in design manager, and the html code embedded on your site page, it’s time to add the CSS to your stylesheet. Go attach the code below:
.reveal-modal-bg {
		position: fixed;
		height: 100%;
		width: 100%;
		background: #000;
		background: rgba(0,0,0,.8);
		z-index: 100;
		display: none;
		top: 0;
		left: 0;
		}

	.reveal-modal {
		visibility: hidden;
		top: 100px;
		left: 50%;
		margin-left: -300px;
		width: 520px;
		background: #eee url(modal-gloss.png) no-repeat -200px -80px;
		position: absolute;
		z-index: 101;
		padding: 30px 40px 34px;
		-moz-border-radius: 5px;
		-webkit-border-radius: 5px;
		border-radius: 5px;
		-moz-box-shadow: 0 0 10px rgba(0,0,0,.4);
		-webkit-box-shadow: 0 0 10px rgba(0,0,0,.4);
		-box-shadow: 0 0 10px rgba(0,0,0,.4);
		}

	.reveal-modal.small 		{ width: 200px; margin-left: -140px;}
	.reveal-modal.medium 		{ width: 400px; margin-left: -240px;}
	.reveal-modal.large 		{ width: 600px; margin-left: -340px;}
	.reveal-modal.xlarge 		{ width: 800px; margin-left: -440px;}

	.reveal-modal .close-reveal-modal {
		font-size: 22px;
		line-height: .5;
		position: absolute;
		top: 8px;
		right: 11px;
		color: #aaa;
		text-shadow: 0 -1px 1px rbga(0,0,0,.6);
		font-weight: bold;
		cursor: pointer;
		}
The Trigger
To launch the modal you will need your users to proactively click on a button or a link. Below is the link tag that you will need to use to launch the modal. If you are going to launch the modal from text you can just add the HTML code below to your site page or landing page. When the user clicks on the text it will launch the modal.
<a href="#" data-reveal-id="myModal">Click on this to launch the modal</a>
If you are going to launch it from a button you will just need to wrap the image in the link tag.
Conclusion
Once you have done that you will be up and running with the javascript modal on your HubSpot CMS site pages and landing pages. This is a great way to bring in additional content whether it be a form, or some other type of content without taking up room on the actual site page. Let me know if you have questions or issues implementing this. Happy Hubspotting!