HubSpot forms
Use HubSpot forms to capture information from website visitors, which you can then access throughout HubSpot. You can share links to forms directly with users, submit form data via the API, and embed them on your website pages using the CMS.
Forms are a core part of the HubSpot and can be created in HubSpot accounts of any subscription level. Not only are forms important for customer conversion, but also because form data can be used in other HubSpot tools and assets, such as smart content, lists, workflows, content personalization, and more.
After creating a HubSpot form, you can add it to your templates and pages. There are a few ways to add a form to a template, depending on your use case:
If your template has drag and drop areas, content creators can add the default form module to a page from the page editor, then configure the form options in the left sidebar.
To code a form module directly into a template with drag and drop areas, reference it as a dnd_module
.
To add a form module to a template outside of a drag and drop area, you'll instead reference it as a standard module
.
With either implementation, you can add parameters to the module tag to specify settings such as the form to use and redirect options, as shown in the code example above. See the default modules documentation for more information on available parameters.
Cloning the default module
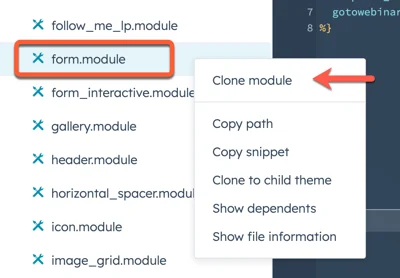
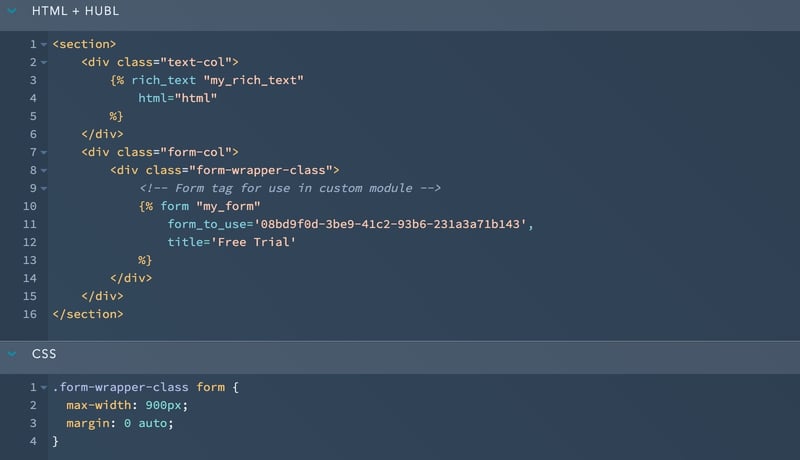
In addition to using the default module as-is, you can clone it to make it editable, enabling you to customize it as needed. For example, you could clone the default form module, add a color field, then wrap the module's HTML in a <section>
tag with styling to add the color as a background:
- In the left sidebar design manager, navigate to the @hubspot folder, then right click form.module and select Clone module.
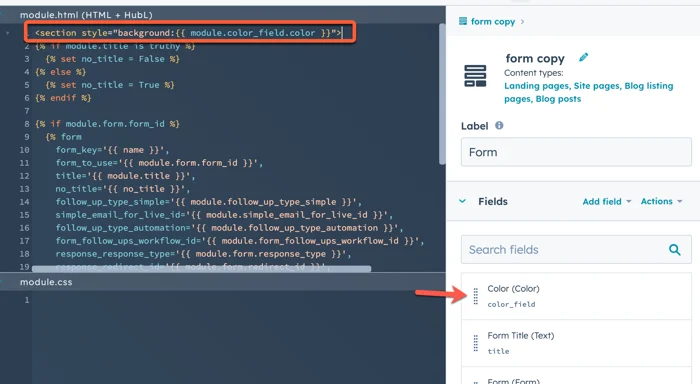
- In the right sidebar, click Add field, then select Color.
- Add a
<section>
tag around the HTML content, then include styling to reference the color field, such as:
<section style="background:">
When creating a custom module, you can include a form in it by adding a form field, along with adding the field's code snippet to the module HTML. For example, you may want to add a consultation request form to a module that contains an image of a product and a descriptive value proposition.
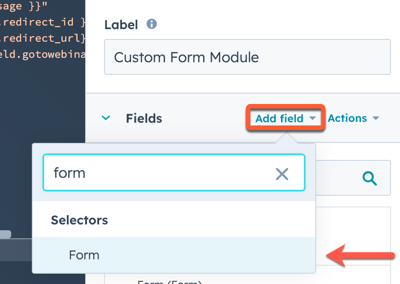
To add a form field to a custom module from the design manager:
- In the right sidebar of the module editor, click Add field, then select Form.
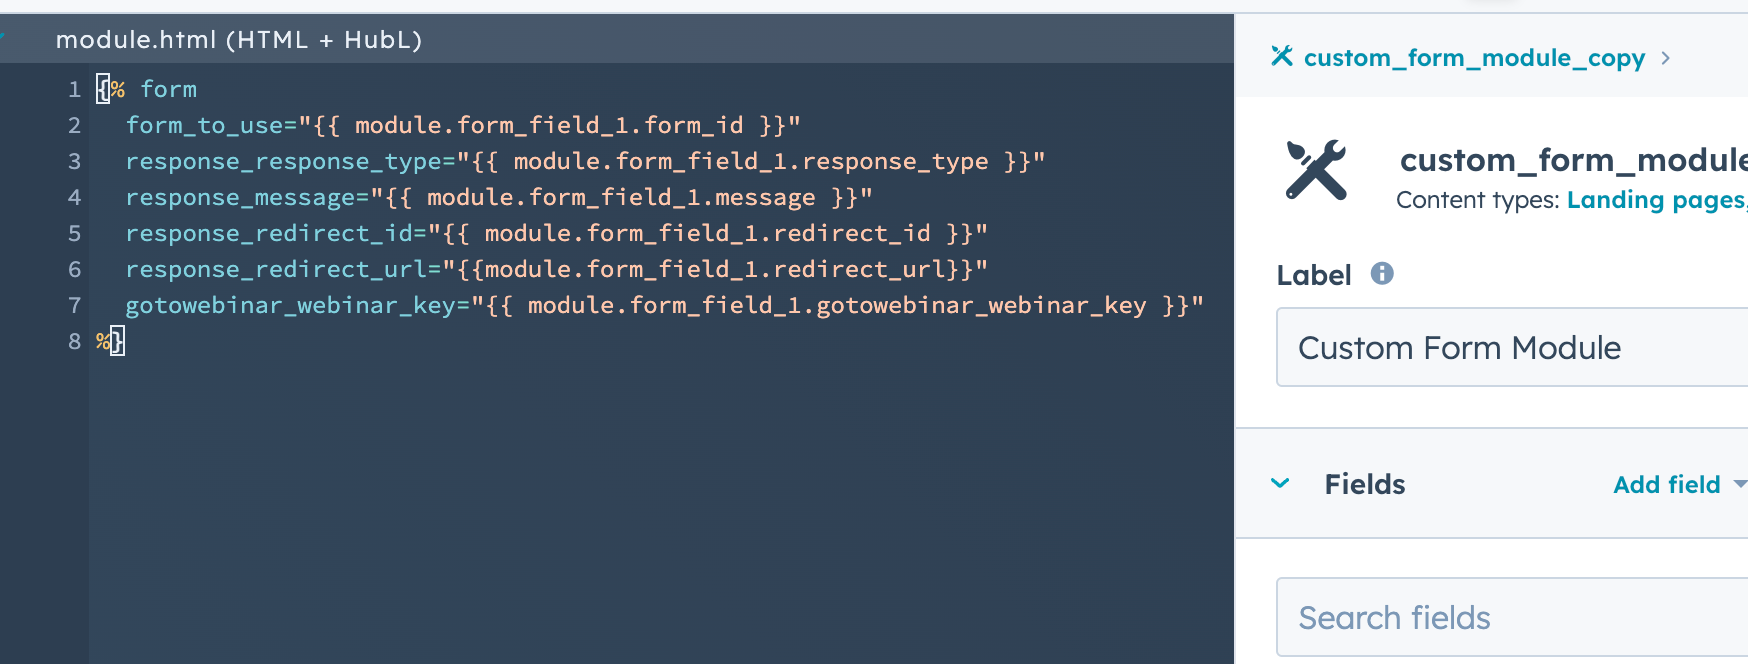
- After adding the field, hover over the field in the right sidebar, then click Actions and select Copy snippet.
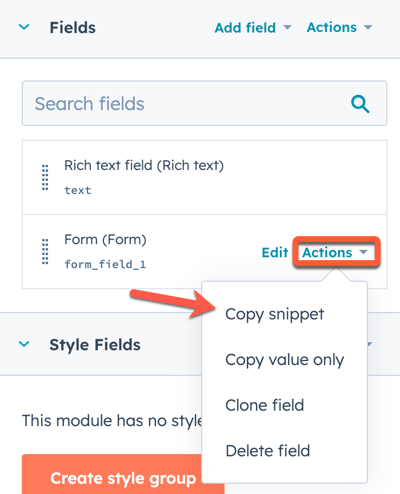
- Paste the snippet into the module's HTML field.
Once added to a page, content creators typically have control over many aspects of the form, including which form to use and the form fields themselves. However, you can limit the amount of control given in the page editor by modifying the form module’s fields.json
file locally to include the following fields:
Parameter | Type | Description |
---|---|---|
disable_inline_form_editing
| String | Set the |
required_property_types
| Array | An array that specifies which forms can be selected based on the property types of the form fields. Values include: |
For example, if you’ve built out a module that should only be used for forms that enable visitors to contact your company’s various services departments, you could allow content creators to only be able to select forms that use ticket properties.
While HubSpot offers form styling from a global setting and form specific setting level, you can also style a form depending on how it's added to your CMS pages.
Please note: all forms generated on the HubSpot CMS (excluding using the form embed code) will ignore any styling that is configured via the global form settings or the form's individual settings.
HubSpot forms added to HubSpot pages can be styled using your website's CSS. HubSpot includes a number of different classes and attributes on forms that are generated where you can apply styling. As a starting point, refer to the HubSpot Boilerplate's form CSS, which represents the best practices for how to style forms.
Forms inside custom modules can be styled by CSS in the module's CSS pane within the design manager. By keeping CSS scoped to the module, you can ensure that whenever the module is added to a page, the styling comes with it. It's recommended to add a wrapper to the form, then using that wrapper as the top-level selector for the CSS. This will prevent your custom module's form styling from being overwritten by additional styles in your websites main stylesheet. Below is a screenshot of the custom module from above with form styling added to the CSS Pane.
Styling forms added via the form embed code
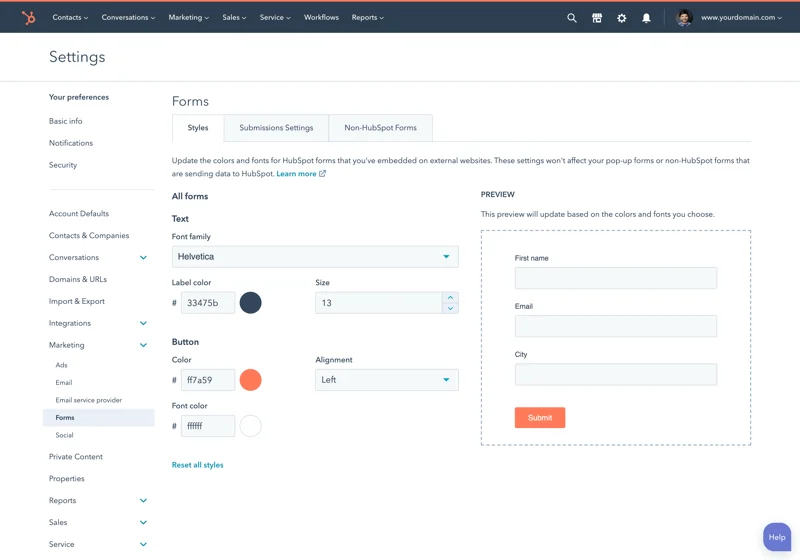
When using the form embed code, you can style the form using the global form styling settings or using your website's CSS.
Using the global form styling settings enables you to configure default settings for every form in the account. You can also override these styles on an individual form within the form editor.
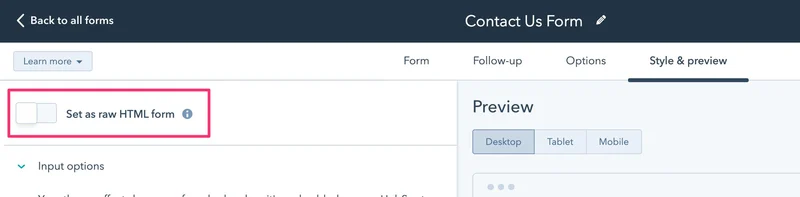
If you have a Marketing Hub or CMS Hub Professional or Enterprise subscription, you can select the Set as raw HTML form option when creating a form. This setting makes the form render as HTML instead of an iframe, which makes it easier to style the embedded form with CSS.
Learn more about styling embedded forms on the Knowledge Base.
Thank you for your feedback, it means a lot to us.