


Local Development Tools: Getting Started
The Local Development Tools connects your local workflow to HubSpot, allowing you to utilize version control, your favorite text editor and various web development technologies when developing on the HubSpot CMS.
The Local Development Tools support a local project of Modules, Drag and Drop templates, HTML, CSS, and Javascript files. This project can then be synced to your HubSpot Design Tools. You can also watch this local project, and automatically sync changes of local files to your HubSpot account, creating a seamless integration between your code editor and HubSpot for rapid development.
In this guide, we'll walk through installing the basics, fetching a project from your HubSpot account, and then sync changes back to your Design Tools. To get the most out of this workflow, you'll need some working knowledge of the Command Line. For more commands and local file formats, see the Local Development Tools Reference.
ℹ️ Did you know you can use free CMS developer sandbox accounts as development environments? Create one now by clicking "Create an Account", selecting your user, and opting to "Create a new, fresh account" here. ℹ️
Install Dependencies
To use the local tools, you'll need to:
- Install Node.js, a Javascript runtime environment that enables the local tools. Versions 8.9.1 or higher of Node are supported, but we recommend the long-term support (LTS) version.
- To install the HubSpot tools globally, run npm install -g @hubspot/cms-cli in your command line. To install the tools in your current directory, run npm install @hubspot/cms-cli.
Note: If you prefer, you can also use Yarn. Homebrew is not required but recommended for easy installation. If you are using Yarn, commands are run with the yarn prefix.
Create a working directory
Create a folder for your local project. For example, run mkdir local-cms-dev in the command line, which will create a directory. Then, run cd local-cms-dev to navigate to that directory.
Set up your configuration file
When you run commands in the local tools, the tools reference this file to authenticate your HubSpot account access. This file may live in a higher level directory than your project files.
Run hs init to connect the tools to your HubSpot account. This command will walk you through the following steps:
- First, you’ll enter a name for the account. For example, you might use "sandbox" if you're using a developer sandbox or "company.com" if you’re using a full customer account. This name will be used when running commands.
- You’ll need a personal CMS access key to enable authenticated access to your account via the local development tools. In the first step, you’ll be prompted to press Enter when you’re ready to open a secure page in your default browser. This page will allow you to view or generate your personal access key, if necessary. (Note: You’ll need at least the Design Manager permission in order to complete this tutorial.) Copy your access key and paste it in the terminal.
Once you've completed this simple init flow, you'll see a success message confirming that a configuration file, hubspot.config.yml, has been created in your current directory.
Your hubspot.config.yml will look something like this:
defaultPortal: DEV
portals:
  # Sample apikey entry, manually entered
  - name: DEV
    portalId: 123
    authType: apikey
    apiKey: 'xxxxxx-xxxxx-xxxxx-xxxxx-xxxxx'

  # Sample personal access key entry, generated from running npx hs auth personalaccesskey
  - name: PROD
  	portalId: 345
    authType: personalaccesskey
    personalAccessKey: >-
      xxxxxxxxx-xxxxxxx-xxxxxxx-xxxxxxx-xxxxxxxx
    auth:
      tokenInfo:
        accessToken: >-
          xxxxxxxxx-xxxxxxx-xxxxxxx-xxxxxxx-xxxxxxxx
        expiresAt: '2020-02-24T19:38:39.164Z'
In the above example, you'll notice multiple entries are supported in the hubspot.config.yml file. You can optionally add a name to an account entry. When running commands, either name or portalId can be used in the --portal= option (ex. --portal=123 and --portal=DEV will both interact with account ID 123 based on the above example). If you set a top-level defaultPortal, you can exclude the --portal= option from your commands, but commands will reference that default portal.
Fetch a project from your account
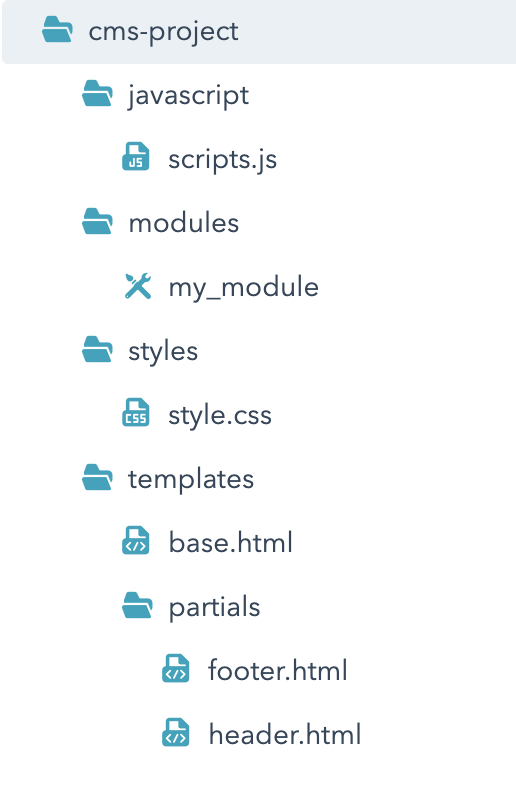
Using the fetch command, run hs fetch --portal=<name> <src> <dest> to get an entire projects folder tree and files from your HubSpot account into your local environment. The src is the project path in your HubSpot Design Tools, and the dest is the path to the local directory you would like the files to be placed, relative to your current working directory. To fetch the project to your current working directory, you can leave out the <dest> argument.
Here is an example of how you would fetch a project from your HubSpot account:
local-cms-dev $ hs fetch cms-projectThis is the Design Tools project we fetched to our local environment:
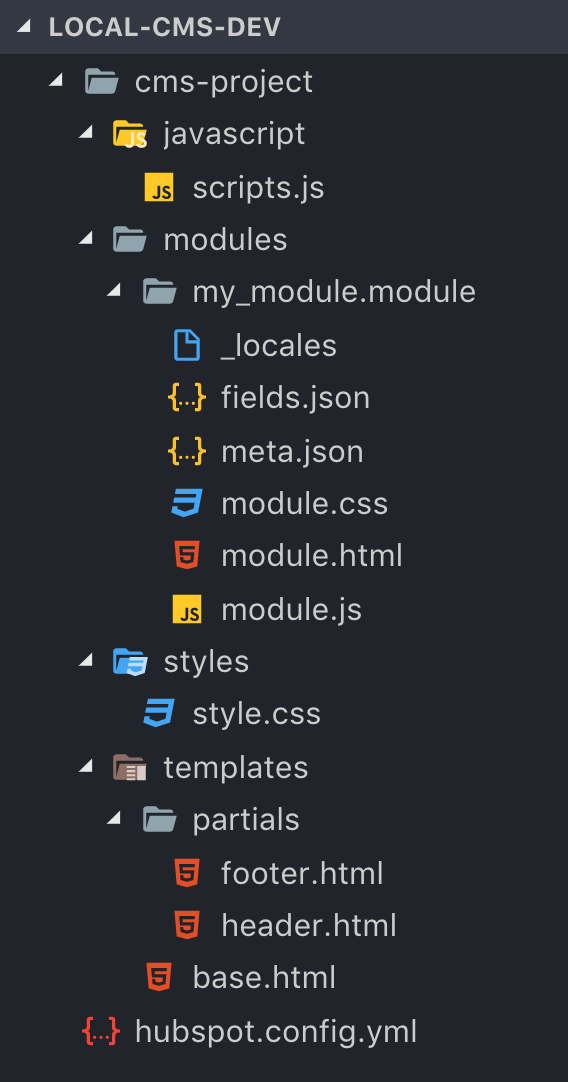
Make changes and sync to your HubSpot account
Using the upload command, run hs upload --portal=<name> <src> <dest> to upload the project in your local environment to your HubSpot account. This will copy the contents of the <src> and upload them to your HubSpot account in the <dest>. If you're creating a new project in your Design Tools, the <dest> can be a net new folder in HubSpot.
Here is an example of how you would upload the example project into your HubSpot account:
local-cms-dev $ hs upload cms-project cms-projectWatch your local project and automatically upload changes
Run hs watch --portal=<name> <src> <dest> to watch your local directory and automatically upload changes to your HubSpot account on file saves.
Here is an example of how you would run that command with the watch command:
local-cms-dev $ hs watch cms-project cms-projectFor more commands, see the Local Development Tools Reference.