In college, I majored in graphic design. The only web design class I took taught us how to use Adobe Dreamweaver by relying heavily on the “insert” menu. It wasn’t until I graduated and worked at my first job as a junior designer when I learned how to code in CSS and HTML. I became comfortable with coding static websites, which were basically just digital brochures. This new coding knowledge was helpful to an extent, but quite limiting. Clients wanted more from us and more from their websites. They wanted to be able to make edits themselves without having to call on us each and every time.
To accomplish this, we had to depend on our developer to either create a custom content management system for each client or use to Wordpress, both of which require PHP. While I appreciated my newfound coding skills, I always felt stuck and helpless when it came to the more advanced functionality that I knew was necessary for an effective website. I didn’t want to just design; I wanted to be able to bring my designs to life.
Fast forward two years and I began working for The Spot On Agency. Not long after, we decided to switch our entire structure to inbound marketing and adopt a program called “HubSpot.” We came in right when the HubSpot COS was taking off, and I was able to participate in the beta classes/certification. I was thrilled at the potential that the COS offered me as a designer. Never did I think that I would be able to achieve so much with mere CSS and HTML.
Once custom modules were unveiled, the possibilities became even greater. Custom modules allow us to work within the template builder, but tailor functionality based on the needs of each individual client. As an example, I’d like to highlight how we used custom modules with our latest web design/build, ErgoScience.com.
ErgoScience specializes in the field of industrial rehabilitation, using the “science of work” to improve safety, productivity and profitability in the workplace. The three pages in which we utilized custom modules for them were: testimonials, resources, and equipment. We knew these were pages that would involve a good bit of maintenance, and we wanted to make it as easy as possible for anyone of any skill level to make edits.
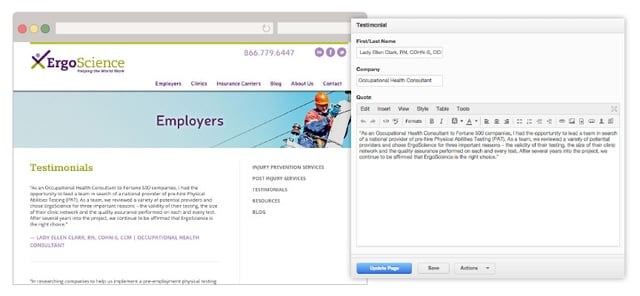
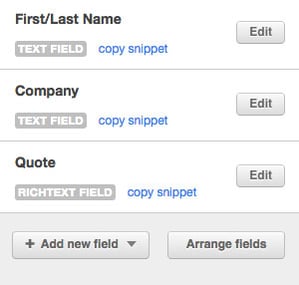
Custom Module #1: Testimonials Page
This was the simplest out of the three. The left column is flexible, meaning modules can be replaced, edited, switched around or deleted, entirely at the page level. The three fields we created in the custom module were: first and last name of the testimonial author, the company associated with the testimonial author, and the quote itself. We also included a horizontal rule to visually divide the space between testimonials. With the combination of custom modules and a flexible column, new testimonials can easily be added at any time.
HTML:
<div class="quote-box">
       <blockquote class="quote">{{ widget.quote }}
           </blockquote><!--//quote-->
               <p class="details">
                   <span class="name">{{ widget.firstlast_name }}</span>
                   <span class="title">{{ widget.company }}</span>
               </p>
                    <span class="accentColor1 .fa">[fa icon="quote-right"]</span>
       </div>
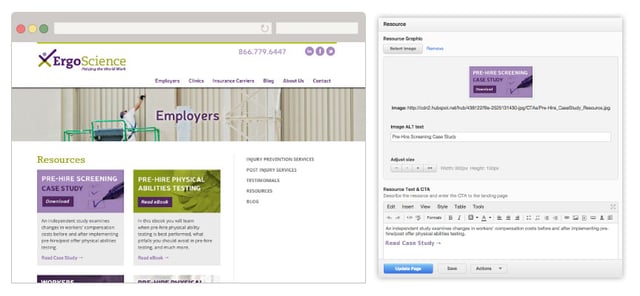
Custom Module #2: Resources Page
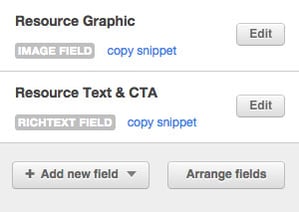
This page is divided up into thirds, with the left two columns defined as flexible. The custom resource module contains an image graphic, description of the resource with a gray background, and a CTA that links to the landing page. Even though ErgoScience is one of our inbound retainer clients and we add most of their resources ourselves, new resources can be added by anyone on our team, no HTML required.
The Front End: What the site visitor and COS user sees
HTML:
<div style="margin-bottom: 31px"> <div class="resourceimage" style="">
   <!-- Each of the fields filled out by the marketer is available under a HubL variable called "widget." --> {% if widget.resource_graphic.src %}
       <!-- Show the selected photo. -->
   <img src="{{ widget.resource_graphic.src }}" alt="{{ widget.resource_graphic.alt }}">
{% endif %}
   <div style="clear: both"></div>
</div>

<div class="resourceinfo">
 <div class="resourcetxtcta">{{ widget.resource_text_cta }}</div>
<div style="clear: both"></div>
</div>
</div>
Custom Module #3: Equipment Page
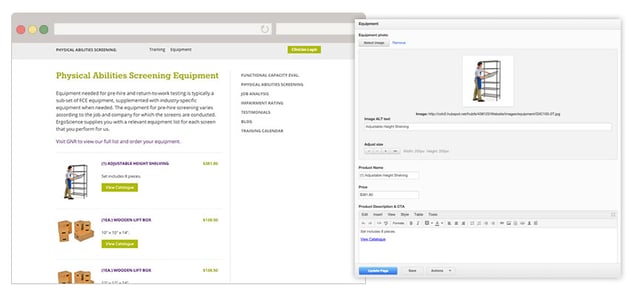
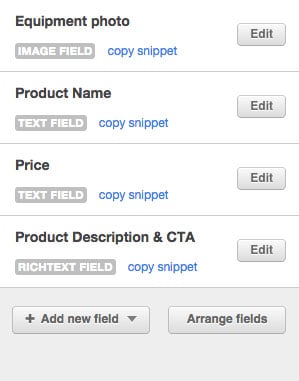
The third and final utilization of custom modules on this site is found on the equipment pages. ErgoScience wanted to recommend equipment for clinics to use during their “Physical Work Performance Evaluations.” To satisfy this request, we again used flexible columns (I just love those things!) and a custom module consisting of fields for an equipment photo, product name, price, description, and CTA. We used media queries to center the equipment photo above the related information on mobile devices so that the visitor can get a clear depiction of the product, no matter how they view the site.
The Front End: What the site visitor and COS user see's
The Custom Module
HTML:
<hr>
<div>
<div class="equipimage">
   <!-- Each of the fields filled out by the marketer is available under a HubL variable called "widget." -->
 {% if widget.equipment_photo.src %}
       <!-- Show the selected photo. -->
       <img class="" src="{{ widget.equipment_photo.src }}" alt="{{
widget.equipment_photo.alt }}">
   {% endif %}
   <div style="clear: both"></div>
</div>
<div class="equipinfo">
 <div>
 <div style="float:left; text-align: left;"><p class="equipprodname">{{ widget.product_name }}</p></div>
 <div style="float:right; text-align: right;"><p class="equipprodprice">{{ widget.price }}</p></div>
 </div> <br><br>
   <div style="float: none; margin-bottom: 40px; text-align: left!important" class="specialequipbutton">{{ widget.product_description_cta }}</div>
   <div style="clear: both"></div>
</div>
<div style="clear: both"></div>
</div>
The HubSpot COS, and specifically the custom module feature, allows any designer with limited knowledge of coding languages to become a developer. Providing clients with the ability to update their own websites was always a distant dream, but now it’s a reality! We are now designing and building most of our websites in-house, eliminating the need to outsource, and allowing us to be hands on every step of the way. As a designer, it can be difficult at times to ensure a site is developed exactly as you envisioned, so when you are able to wear both hats, you are always guaranteed fantastic results!