Splattering colors and shapes all over the canvas is a painter’s way to create whatever comes to mind. A graphic designer is similar to a painter in a way that they are both creative expressions, yet graphic designers creations tend to be more strategically driven.
An astute graphic artist follows a series of steps before (s)he can begin the actual design work. This system, standard procedure, process, series of steps, or whatever you coin it is a way to ensure that you are delivering exactly what the client needs. A design for a client has to fit a specific set of requirements, so it's only natural that the process to figure out what client needs to produce an effective output is based on a logical flow.
In this post, we'll cover the seven steps needed to deliver a graphic, including:
Let's get going!
Briefing the Project With Your Client:
The first critical step to a well-thought out design process is a briefing. The client is going to give you a “brief” overview of what he needs. At this point, a graphic designer is expected to gather as much information as (s)he can about the client’s expectations, their company's mission, vision, and goals, as well as their products or services. It's worth noting that designers need to go beyond the surface level of what the company does and dive into the benefit for their customers so that this critical component can be translated in the resulting designs.
Some designers require their prospects to fill out a questionnaire to gather some basic information and provide them an estimated price rate. Providing a design brief allows the designer to set the tone for what fundamental information is needed to begin the project, with an emphasis on the "need to know" over the "nice to have" information.
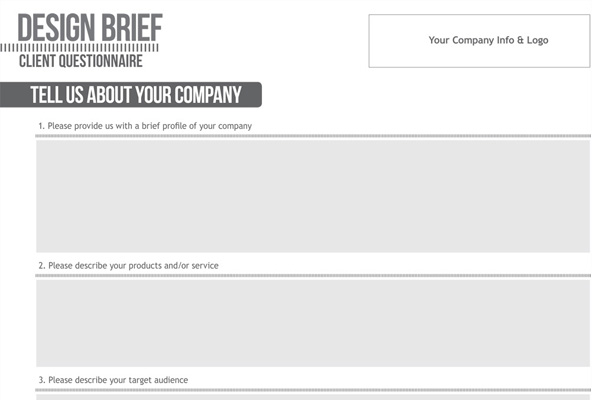
A brief sample
If you're looking for some questions to form your own design brief, check out "55+ Questions to Ask When Designing a Logo" by web designer Preston D Lee. While this post is specific to logo design, the questions are a great starting point that can be modified for your needs.
Researching Your Client's Ecosystem:
Once you have received a brief overview from the client, you can dig into every possible material you find and start researching. During this phase, an expert designer would seek information on the competitors, point of differentiation (POD), market, audience, trends, and future prospects.
The idea behind researching the client’s competitors is to ensure that you don’t copy or make anything too similar. The objective is not to steal a competitor’s idea, as this takes away from any differentiation the company may offer in their market, rather, to understand the lay of the land. Once you have insight into their market and point of differentiation, you can begin to dig into their current and potential customers to understand who you are designing for.
Overall, the purpose of this research is to give you a 360° view of the client's ecosystem and generate ideas that fit the market, industry trends, and the client's customers.
Brainstorming on the Message:
The combination of the briefing and research will open a path to producing relevant ideas. So, put the pen to paper start brainstorming design ideas.
It's important to remember that each and every element of a design is sending out a message to viewers, from colors and typography to the tagline and symbols. Each element should be given considerable thought before making any hard decisions. The brainstorming process should allow for a creative exploration of how these different elements can work together to support the message. Generate a list of ideas that can be used in the next step, the sketching phase.
Sketching out Mockups:
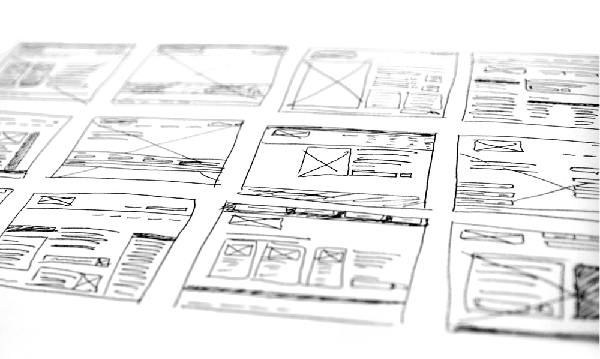
At this step you can start drawing rough sketches of your ideas. The method you use to capture your sketches depends on the tools you are comfortable. I highly reccomend starting with a paper and pencil, as you'll be able to quickly iterate on rough designs. Once you feel comfortable with your progress, take your mockup to the computer. Remember, you don’t want to make anything final or perfect at this point. In this stage, you are just beginning to materialize the ideas in your imagination.
Once you have finally quenched you creative exploration, you can start sharing your sketches with the client. Although this process might seem lengthy and unnecessary, it is extremely important! It saves you an immense amount of time resulting from redo's and rejections after you have completed the design on the computer. Providing these early sketches gives you have a fair idea of whether or not you are headed in the right direction. If not, you can quickly pivot and make further variations because you've only entered the sketching phase. From here, pick the sketch you and your client both agree on.
Building the Design:
Now it’s time to get cranking with your designs! This is where the meat and potatoes of graphic work comes into play, so it's time to have fun.
Get busy with your design software and start creating several versions of your selected sketches. Creating several variations of the design will allow you to present options to the client so they can pick the most suitable design. Try mixing and matching color palettes, typographic pairings, and a grid structure to create variation.
At this point, it is really important to receive client feedback as you work. Show your “draft” designs to the client and ask for his feedback. It isn’t uncommon to try several rounds of this step before finalization.
Tip: Don’t restrict feedback to just the client’s thoughts and opinions. You can also ask a friend or family member with a keen eye for design and ask them what they think. They could possibly provide valuable feedback, especially if they are the target audience.
Presenting and Refining the Work:
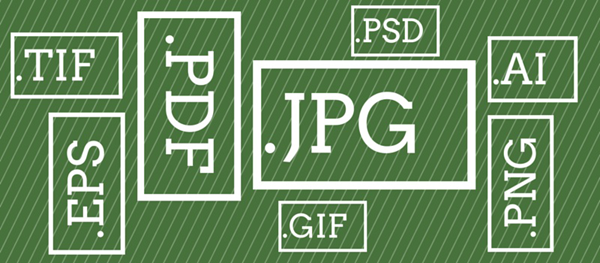
With a final design in hand, you can start the implementation phase by presenting your final piece. A printed graphical work would require a print-ready file format. A design intended for a website should take the use case into consideration when choosing the right file type.
 Give the client another chance to review the end product and provide feedback. If it aligns with the brief's objectives, you should be good to go, however, don't be surprised when the client sneaks in one final request. As the expert, you can mitigate these requests by ensuring you have taken the brief into account. Don't be afraid to defend your decisions.
Tip: To avoid changes to your final works, you should spend as much time as you can during the drafting and preliminary work process. Details of author’s corrections and additional charges should be included in the initial quote. Most graphic artists specify how many revisions of the first draft are allowed before they start charging extra in the initial quote.
Putting the Design Into Production:
Finally, the design has been approved and you are all set to deliver the design! At this point, a designer will hand over the final product to the client or a third party, like a printing press. Be sure to include any special instructions that the client or third party may need.
A Job Well Done!
If all goes to plan, you have produced something that has satisfied your client! Now, you can receive the fruits of your hard work. The final bill or invoice is usually transferred online using online invoicing software. Hiveage, FreshBooks, and Invoiceable are great starting points for free invoicing software that ensure a fast, efficient, and secure transaction.
A well-defined, systematic procedure nails down the project with a guarantee that all the parties involved are fully satisfied with the result. Remember, where there is more than one party involved, it is a matter of give-and-take. There is no hard and fast rule to what “system” works best. What works well for you may not be the best method for another. Try to come up with your own methods in ways that make your end product even more effect and effective.
Need more design tips or insight into design process? Check out How To Reduce Client's Design Revisions.