The Challenge
A while back the great people at HubSpot approached our team at Savvy Panda with the project of redesigning and rebuilding their designers.hubspot.com portal. We gratefully accepted the challenge and it turned out to be one of our favorite projects that we have completed.
It was also a chance for us to push the HubSpot COS to see what it could do. It’s easy to see that its templating system is very flexible, responsive, and efficient, and its blogging system is robust and easy-to-use. But how would it handle different types of content, like a portfolio listing page and detail pages?
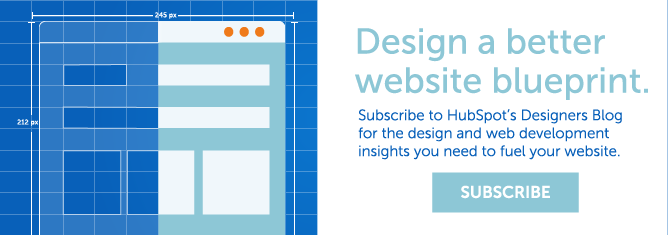
One of the requirements was to build a section of the site that would dynamically show thumbnails of all the latest showcase sites in the online portfolio, allow for the filtering of results based on site categories, and then have the thumbnails link through to the full details page of each of the showcase sites. You can see the end result on the Inspiration page.
Using HubSpot’s Blog System as a CCK
Fortunately, with a little bit of careful reading of HubSpot’s HubL documentation we discovered we could use the blog system to create custom post types similar to what is often called a Content Construction Kit (CCK) on other CMSes. Basically that means that you can create custom fields to hold each of the bits of information that make up a certain type of page. Then you can use templates to display that information on the main category-level page (aka “listing page”) and the detail (or “post”) page. We will call this a “Custom Post Type”.
So in our case we reviewed our design and determined that we needed the following information pieces to make up our “Portfolio” page type:
For the Listing page:
- Site thumbnail (image)
- Tags for New or Not New (text)
- Tags for whether it was designed by an agency or not (text)*
- Tags for what kind of template it was (eg. Page, Blog, Email) (text)*
* The last two fields were used in our site filter. More detail on that in our next blog.
For the Post (Detail) page:
- Desktop Screenshot (image)
- iPad Screenshot (image)
- Mobile Screenshot (image)
- Main Description (text)
- Designer Quote (text)
- Designer Image (image)
- Designer Signature (rich text)
So we set about designing a post type that would allow HubSpot’s internal marketing people to create a new “blog” post that would have all the above fields. They would just have to fill in each piece of information, save and publish the post, and then the new portfolio site would appear, perfectly formatted, on both the Portfolio Listing page and also the individual showcase page for that site.

Creating a Custom Post Type
Step 1 - Create a new template
For the purposes of this post we will assume you know how to work with regular blog templates. If not we suggest using the resources found here. We created a new blog template (or you could clone an existing one). We named it “Portfolio Layout” because that clearly relates to the “Portfolio” - naming conventions help you keep related content together and stay organized.
Step 2 - Create a new blog
We then created a brand new blog for our portfolio entries. Each site in our portfolio is a blog entry in this category. HubSpot has some excellent documentation for getting a new blog set up which you can find here.
For our purposes we made the following setting tweaks:
- Number of Posts per Page: 100 - This is a portfolio listing so we can fit a lot on the page, in fact we want to show ALL the portfolio items.
- We made sure “Use same template for blog listing pages” was checked.
- We made sure “Use featured image in listing summaries” was checked.
- We selected the “Portfolio” template created in Step 1.
Step 3 - Create the custom fields
Once we had the template created a new blog type that linked to it, the next step was creating the custom fields that the user will fill in when creating a new custom blog post.
We took care of the top part of the page that has the images of the desktop, iPad, and mobile phone by using a Custom Module. The fields of a Custom Module appear in New Blog Post entry form, so they worked great for creating the top part of the page. For more information on how to use a Custom Module check out this tutorial.

We created the rest of the custom fields simply by declaring them in the “Post Template” section of the Blog Content are of our template . Custom fields declared in the Post Template are also available in the Listing Template.

We needed 4 fields to appear in the Listing view, but not the Blog view. However these still need to be declared in the Blog view. We did that by adding the code below to the very top of the Blog Template:
NOTE: replace all "(" and ")" with "{" and "}" if using any code in this post. These have been changed in this blog post so that HubSpot doesn't try and replace them with actual content.
(% text "new" label="Type 'new' here to feature site with banner", export_to_template_context=True %)

(% image "thumbnail_image" label="Image for the main page, min width: 350px", export_to_template_context=True %)

(% text "designer" label="Designer: Who designed it? [self-designed | agency-designed]", export_to_template_context=True %)

(% text "template_type" label="Template Type: Enter one or more of [Landing-Page | Blog | Website | Email]", export_to_template_context=True %)
The ‘export_to_template_context=True’ allowed us to declare the fields without actually showing it on the Blog page, but still making it available to the Listing page. Also we made sure to add good detail to the “label” so that the user is guided to enter the correct data when submitting the blog entry.
The rest of the Custom Fields are declared normally in the context of the Post template:
<div class="row">
    <div class="span6 about">
        <h4>About (( content.name ))</h4>
        <p>
            (( content.post_body ))
        </p>
    </div>
    <div class="span6 designer">
        <h4>From the Designer</h4>
            <blockquote>
                 (% text "quote" label="Enter the quote from the designer "%)
            </blockquote>
        <div class="designer-image">
            (% image "designer_image" label="square image for the main page, min width: 130px" %)
        </div>
        <div class="signature">
           (% rich_text "signature" label="Designer Signature "%)
        </div>
    </div>
</div>
As you can see, the above code in the Post Template both declares the fields and gives HTML structure to the template at the same time.
Step 4 - Create the Listings Template
The final step of our process was to use the fields declared in the Post Template and populated by the user when adding a new blog post of type “Portfolio” to create a grid of portfolio thumbnails that we could display on our main Portfolio page. First I will paste the full Listings template code from the Blog Content are of our template, and then I will show what each section of the code accomplished.
<div class="blog-section portfolio">
  <div class="blog-listing-wrapper cell-wrapper">
    <div class="row same-height-parent isotope">
   (% for content in contents %)
   <div class="span4 original inspire-site (( content.widgets.designer.body.value )) (( content.widgets.template_type.body.value ))">
      <a href="(( content.absolute_url ))" class="inspire-block">
        (% if content.widgets.new.body.value == 'new' %)
           <div class="new-banner"></div>
        (% endif %)
        <div class="portfolio-image-wrapper">
           <img class="portfolio-image" src="(( content.widgets.thumbnail_image.body.src ))" alt="(( content.widgets.listingimage.body.alt ))" />
           <span class="cta orange">See More</span>
        </div>
        <span class="portfolio-title same-height"> (( content.name)) </span>
      </a>
   </div>
  (% endfor %)
 </div>
 <div class="blog-pagination">
   (% if last_page_num %)
      <a class="previous-posts-link cta orange" href="(( blog_page_link(last_page_num) ))">Previous</a>
   (% endif %)
   (% if next_page_num %)
      <a class="next-posts-link cta orange" href="(( blog_page_link(next_page_num) ))">Next</a>
   (% endif %)
 </div>
</div>
</div>
Let’s explore this template a little more, starting with the main content section:
(% for content in contents %)

   ...

(% endfor %)
This code simple loops through each blog entry. The data for each entry is stored in the variable “content”.
<div class="span4 original inspire-site (( content.widgets.designer.body.value )) (( content.widgets.template_type.body.value ))">
Here we see the first example of how to reference the value of a custom field. The “content.widget.<name of field>.body.<property>” pattern is used repeatedly to gain access to the Custom Field values. In this case we are adding some text to the class of the wrapping div which we can later use in our Javascript filter function.
<a href="(( content.absolute_url ))" class="inspire-block">
We borrowed this straight from the default blog template. “((content.absolute.url))” is the link to the blog detail page, or in our case, the portfolio detail page.
(% if content.widgets.new.body.value == 'new' %)
  <div class="new-banner"></div>
(% endif %)
This code checks to see if they entered “new” for the New? field. If they did then we include a div that displays the New banner on the front end.
<img class="portfolio-image" src="(( content.widgets.thumbnail_image.body.src ))" alt="(( content.widgets.listingimage.body.alt ))" />
Here you can see the code to display the image that the user uploaded for the “thumbnail_image” field when adding the blog post.
Bringing it all Together
If you visit the live site you will see that we also used the above structure to create a dynamic Javascript filter to add some extra functionality and interest to the page. In the next installment in the How We Did It we will walk through how we made that work (TIP: we did a little bit of HubL coding)!
To Infinity and Beyond
I hope the examples above of how we created the Portfolio/Showcase page for designers.hubspot.com have given you some tools and examples that will inspire you to create your own Custom Post type. The possibilities are endless. Just recently we used this same technique to build a Real Estate listings page on the COS. What will you build?